|
|||||||
Table of Contents
Dune
Buggy's
Family
Racing
Resume
Sandrailing
Volkswagens
Periodicals
VW
Magazine Online
HOT VWs
Last updated:
02/24/01
dean@vdubn.com
Advertisements:

|
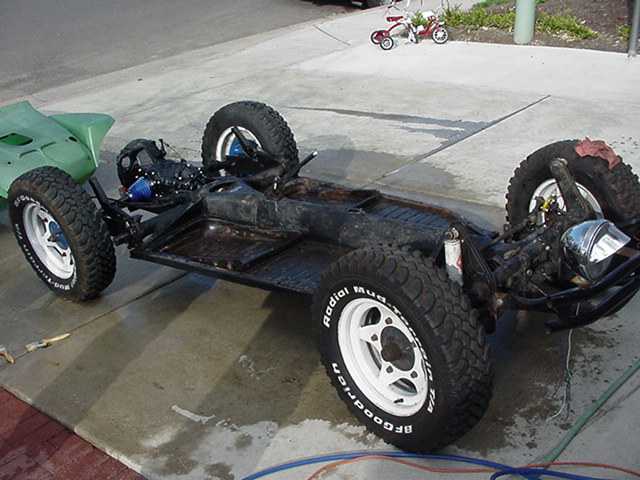
What were the tasks? First of all, I would like to give major credit to Randy Gredvig, the guy that did all of my fabrication work, without him, none of this would look near as good or be as functional as it is. I had a list of things that I wanted done to the pan, and as the project continued, that list only grew. 1. Strip the Pan and cover with POR-15 2. Convert the rear torsion housing to IRS from Swing 3. Weld Seat Belt brackets onto the tunnel 4. Create hydraulic clutch master cylinder mounting bracket 5. I decided that we needed to strip the whole pan, not just the top side, and then powder coat the whole pan matte black (looks much better) Each of the previous items had it's own set of challenges, here is a brief description of the hurdles we ran into with each step. Step 1 (Pan restoration with POR-15): We spent three days prepping and painting the pan with POR-15, and I have to say that I was totally unsatisfied with how it adhered, how it dried, and how the kit I bought, specifically for floor pan restoration, had barely enough supplies to finish the job. Because of all of these problems, and since I had to grind away spots for tabs, flanges, what have you, I decided to get the whole pan powder coated at the end of the project, right before final assembly. Step 2 (IRS Conversion): This was a huge undertaking, and we went through at least two different plans before handling it the way that we did. Using the first plan, I bought the IRS clips, and all of the IRS components, spring plates, trailing arms, etc., and tried to get the stuff installed onto my original pan (to save the VIN number so that I wouldn't have to get another title for the vehicle). After realizing how many hours it would take to carry out the first plan, since I didn't have the jig's required to get everything configured for the IRS clip installation, I figured it would be easier to buy a late model car with a good title and fuse the IRS section into the car. So, enter the 2nd plan, for $75 I got a pan with a good torsion housing and a good title, and I was good to go. Randy cut out the old torsion housing and fused in the new one, it ended up looking excellent. Step 3 (Welding Seat Belt Brackets): This was the easiest task, Randy welded in two brackets, you can see in the pictures above. Step 4 (Create the Clutch Master Cyl. Mounting Bracket): This was actually the worst of everything, it took us over 4 straight hours to get the mount fabricated. I used what was called a CNC Clutch Kit that was the Master and Slave Cylinders, and the mounts to install it into a stock bug without cutting the front firewall. I was told that this kit only required a SLIGHT amount of fabrication, what an understatement. After a ton of guessing, a ton of measuring, and finally just taking a stab at it, we got it installed and it works great! I'll show some additional pictures of it installed once the car is closer to assembly. Also, we had to relocate the front drivers brake line bracket by an inch, so that the Master Cylinder wouldn't interfere with the brake hose. The last question, how do I route all of the hydraulic lines, there are going to be quite a few. Step 5 (Powder Coating the Pan): I had the complete pan powder coated by Portland Powder Coating. To see how good of work Portland Powder Coaters did, check out the Powder Coating page. |